Bybit Pay Later is a financial service that offers short-term liquidity to help you manage your spending more flexibly. When you make a purchase with Bybit Pay, it allows you to borrow funds instantly at checkout and repay them in monthly installments. Please note that Bybit Pay Later is only available on the app. This guide will walk you through how to get started with Pay Later on Bybit Pay.
How to Pay in Installments
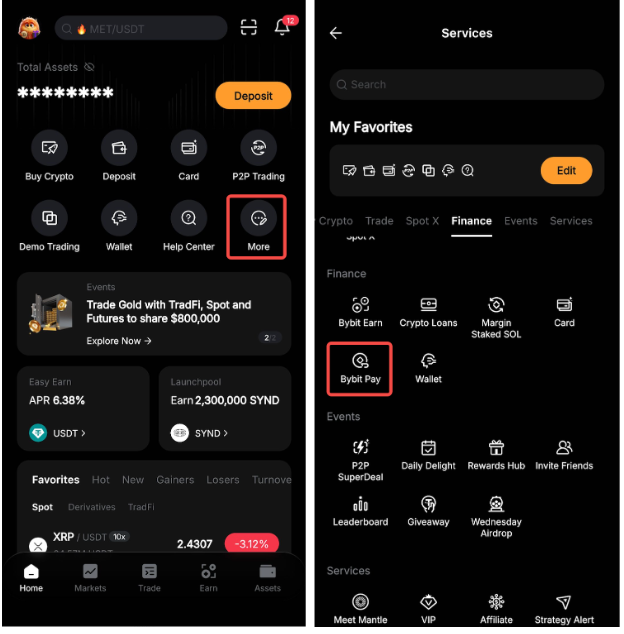
Step 1: Make sure your Bybit Pay is activated before using Pay Later. You can do this from:
-
The Bybit App homepage: Tap More, find Bybit Pay under Finance, and tap Activate Bybit Pay.
-
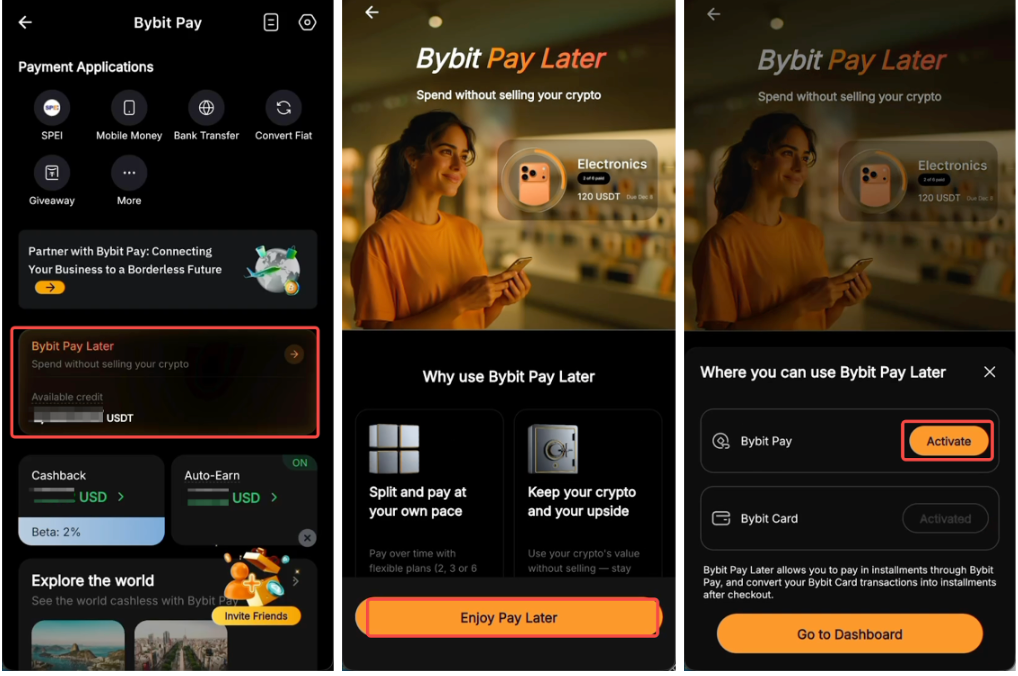
The Pay Later homepage (accessible via both the Bybit Card and Bybit Pay homepages): Tap Enjoy Pay Later, then select Activate for Bybit Pay on the pop-up page.
Step 2: Make a purchase using Bybit Pay's QR Pay feature on the Bybit App. On the checkout page, select Pay Later and tap Confirm. If you're a first-time user, choose Pay with Pay Later to proceed.
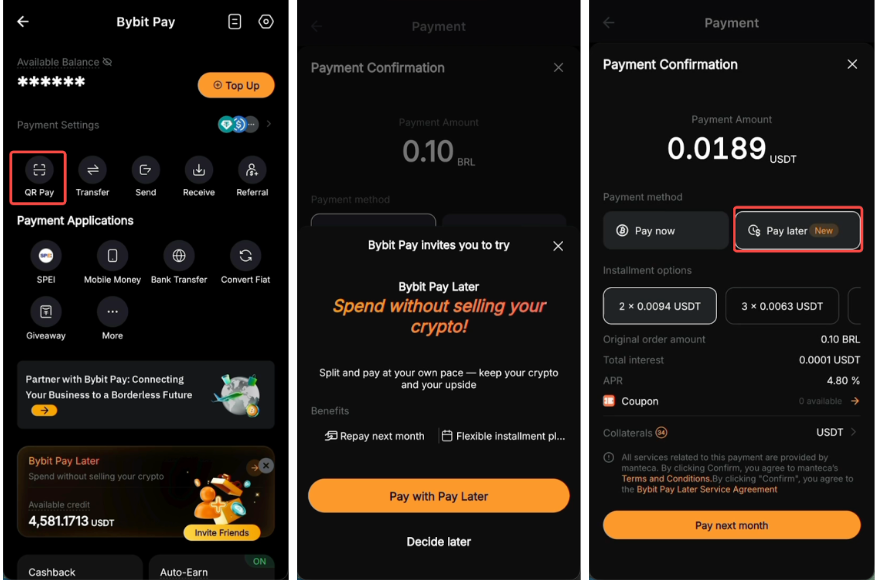
Step 3: On the Payment Confirmation page, select your preferred installment plan and tap Pay next month.
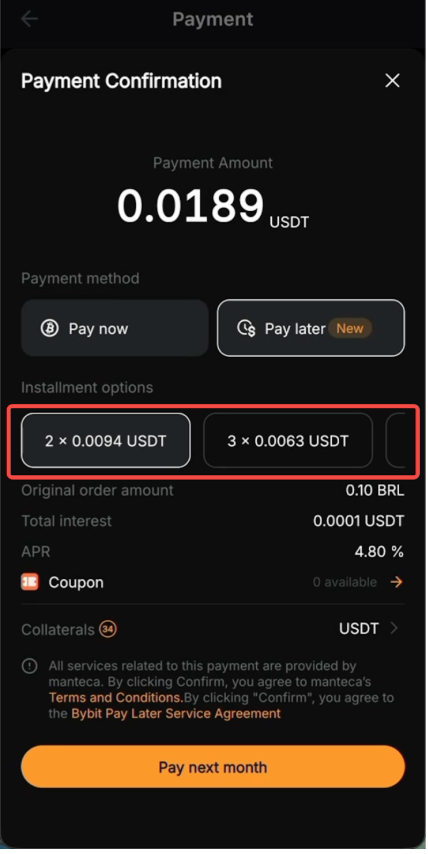
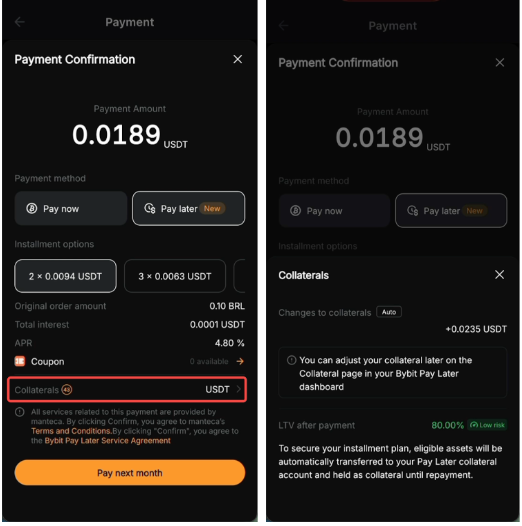
Note: The annual interest rate, installment amount and required collateral may vary depending on your chosen plan. You can view the system-selected collateral by tapping the right arrow icon next to Collaterals.
Step 4: Your installment plan details will be displayed. Tap the right arrow icon next to Bybit Pay Later for more information.

Notes:
— To learn more about how to use Bybit Pay, refer to this article.
— Bybit Pay Later is currently available only on the Bybit App.
— Once a Pay Later order is confirmed, the installment plan cannot be changed or canceled. This means that even if your original Bybit Pay purchase is canceled or refunded, your Pay Later order will remain active, and you'll still need to make the required repayments according to your monthly statement.
How to Adjust Your Collateral
When you make a purchase with Pay Later, the system automatically selects collateral for you. You can, however, adjust it any time from the Bybit Pay Later dashboard.
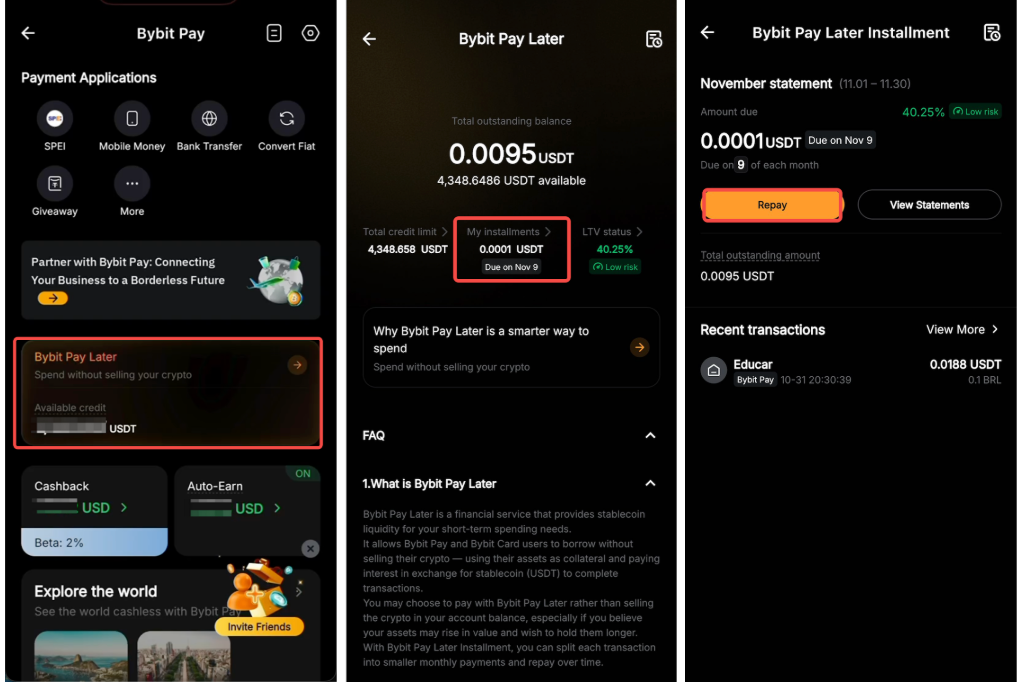
Step 1: Go to Bybit Pay and tap the Bybit Pay Later section in the middle to open the Pay Later homepage.

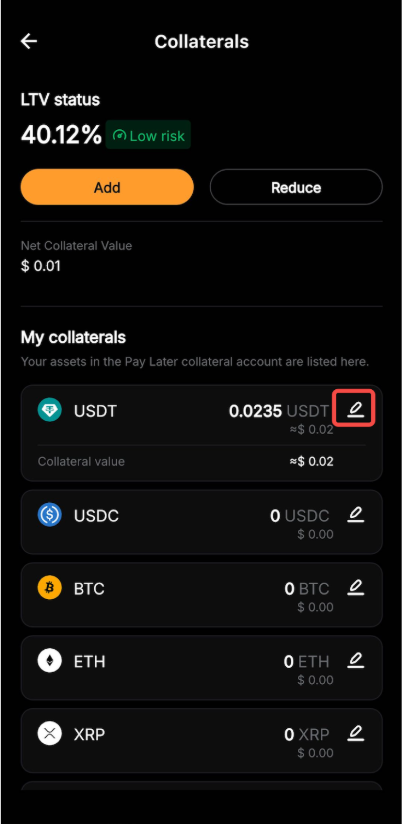
Step 2: On the Bybit Pay Later homepage, tap LTV status to access the Collaterals page.

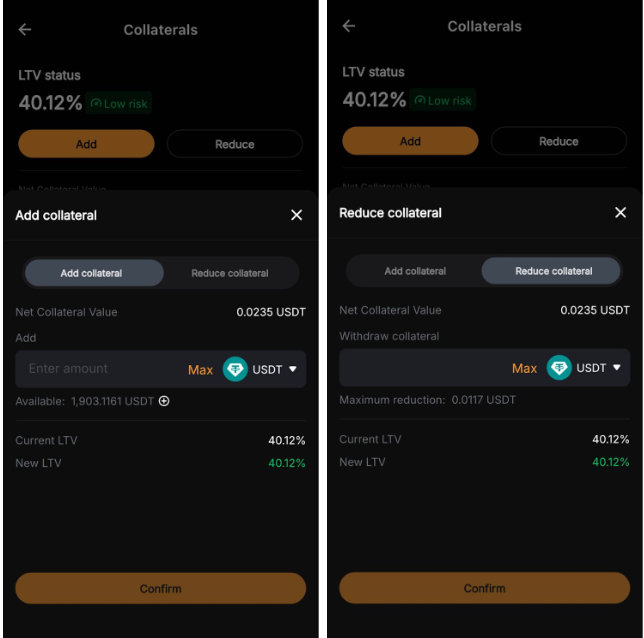
Step 3: Tap Add or Reduce to adjust your collateral.
-
Add: Opens the Add collateral tab. Choose the collateral token and enter the amount you'd like to add, or tap Max to use the full available balance in your Funding Account. Adding collateral lowers your LTV and reduces liquidation risk.
-
Reduce: Opens the Reduce collateral tab. Choose the collateral token and enter the amount you'd like to reduce, or tap Max to remove the maximum allowable amount. Reducing collateral raises your LTV and increases liquidation risk.
You can also adjust the collateral by tapping the edit icon next to an asset under My collaterals.
Step 4: Double-check the details and tap Confirm to apply your changes.
Notes:
— During the purchase process, the system automatically selects collateral from your Funding Account, starting with the asset that has the highest USD value. You don't need to make any manual selections.
— Stablecoins such as USDT and USDC cannot be used as collateral.
— Collateral can only be reduced if the current LTV is below the initial LTV of 80%.
— The maximum reduction quantity refers to the amount that brings your LTV back to its initial level. Please refer to the amount shown in the adjustment window.
— For more details on how the collateral works, refer to FAQ — Pay Later on Bybit Pay.
How to Make a Repayment
You can make a repayment anytime after your monthly statement is available on the 1st of each month, and no later than the 8th, which is the repayment due date. Simply follow these steps:
Step 1: Go to the Pay Later homepage and tap My installments → Repay.
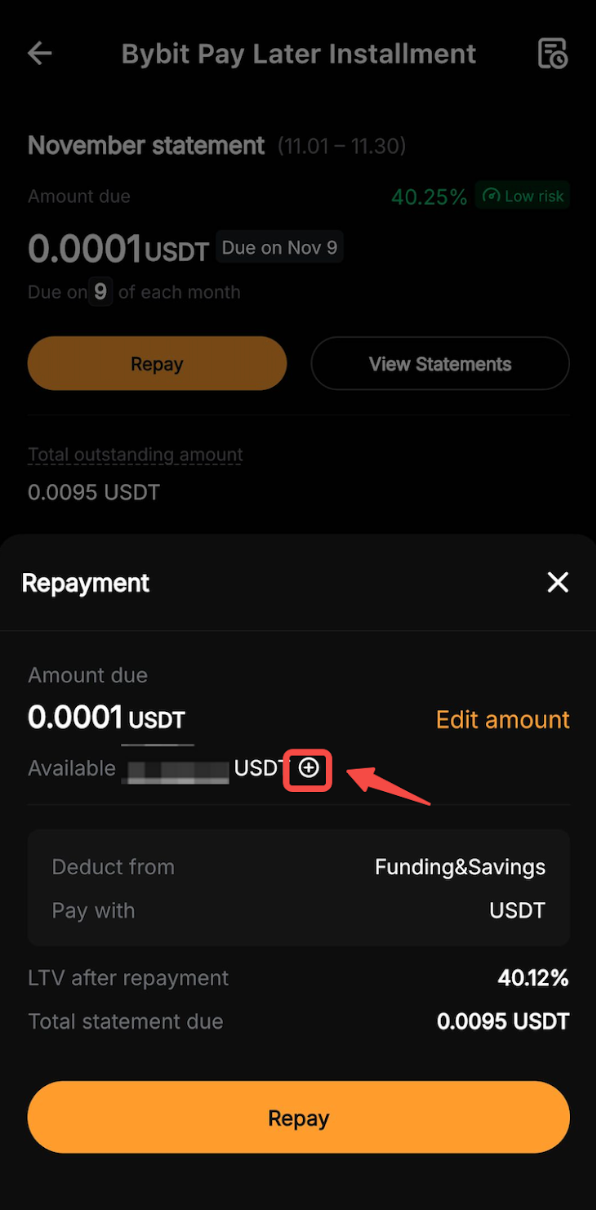
Step 2: In the Repayment pop-up window, choose to repay your monthly due amount in full, or tap Edit amount to enter a custom repayment amount.
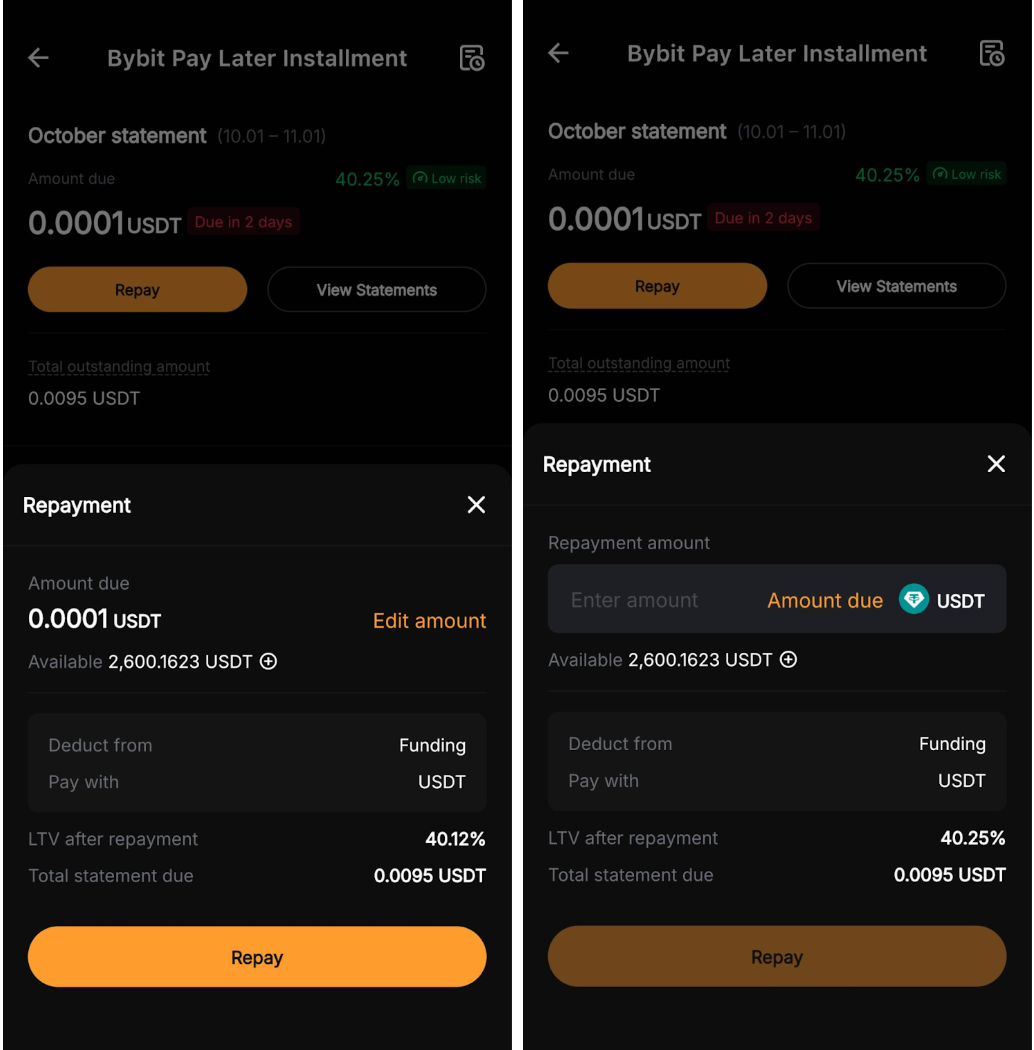
If you don't have enough funds in your Funding Account, tap the plus icon next to the available amount to add more funds.
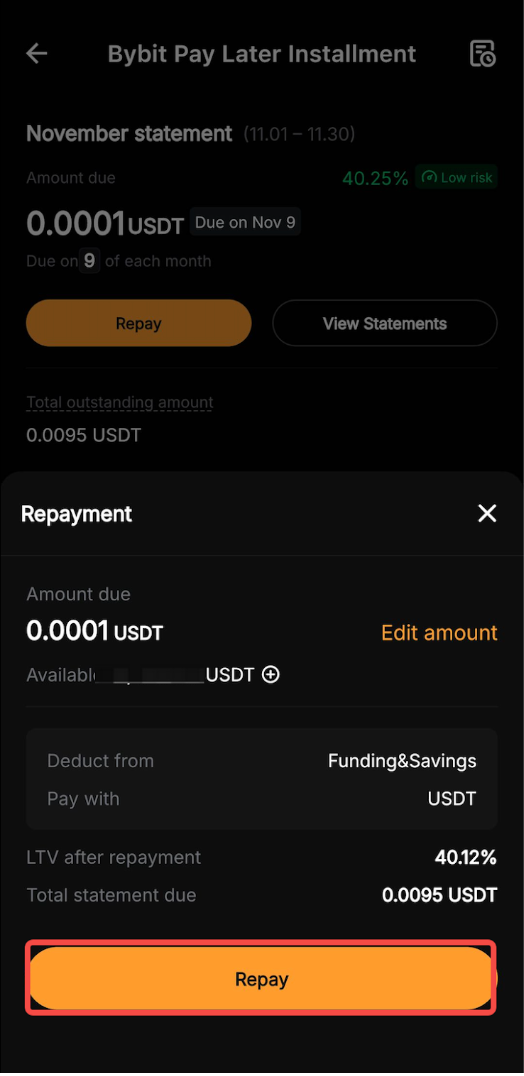
Step 3: Review the details and tap Repay to confirm.
Notes:
— Early repayment is not available before the monthly statement is generated.
— Only USDT from your Funding Account can be used for repayments.
— A 72-hour grace period applies after the due date on the 8th of each month, during which penalty interest at three times the regular rate will be charged hourly. If the outstanding amount remains unpaid after the grace period, your collateral will be liquidated and a 2% liquidation fee will apply.
— You can choose to repay your monthly due amount either in full or partially once your monthly statement becomes available on the 1st of each month. Please ensure all dues are settled by the 8th to avoid penalty interest or liquidation.
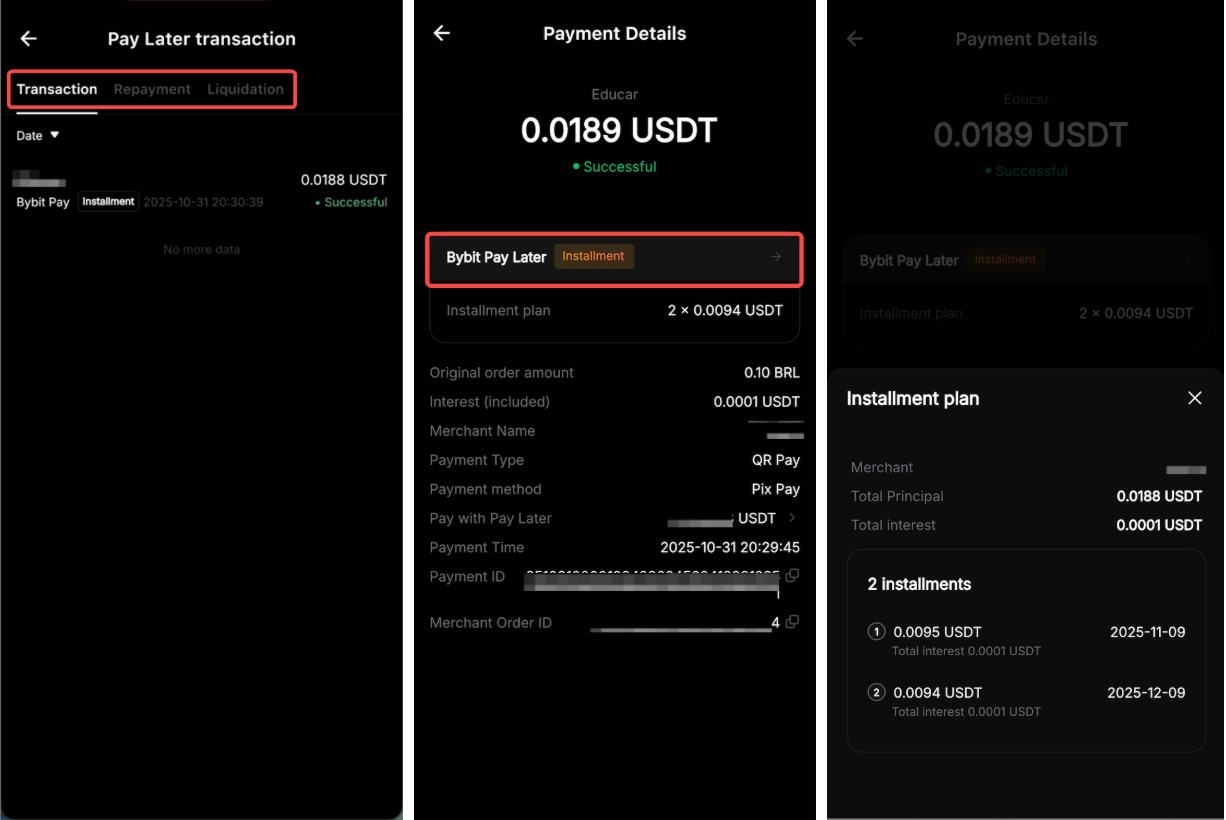
How to View Your Installment History
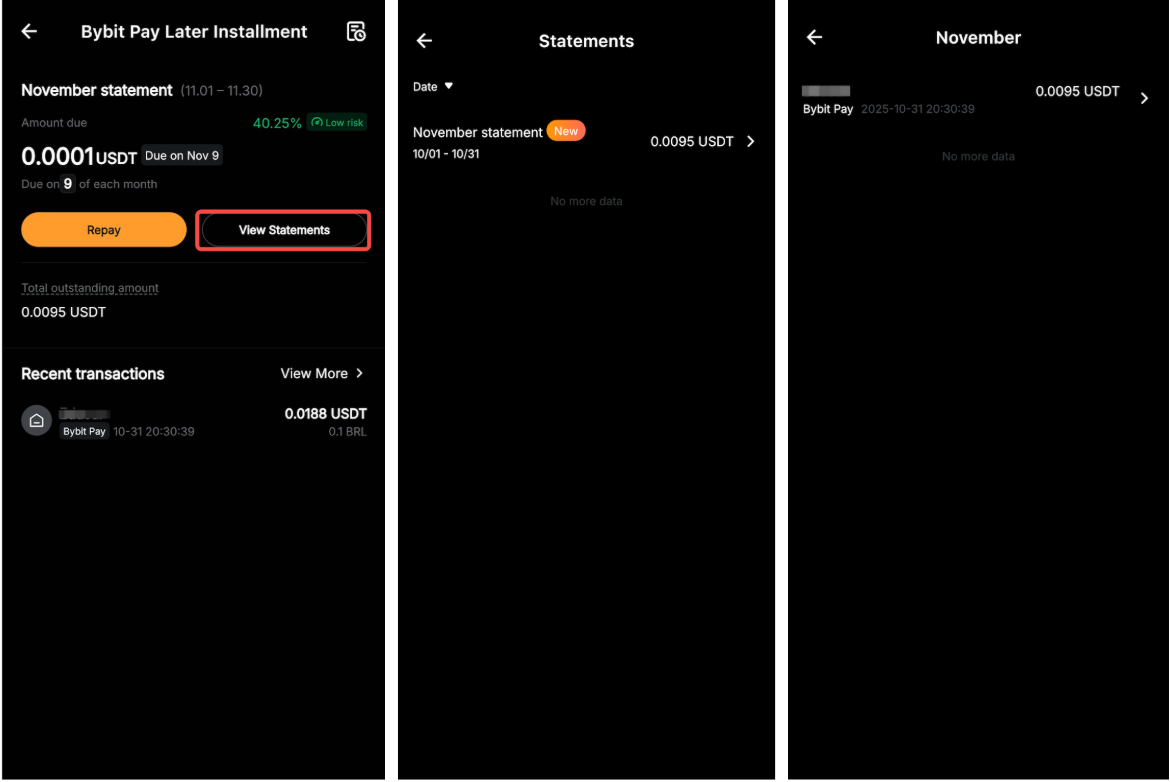
Go to the Pay Later homepage to get an overview of your installment plans, including the monthly amount due, due date and total outstanding balance.
Tap View Statements to check your monthly statements, and tap the right arrow icon on the right to see all installment transactions for a specific month.
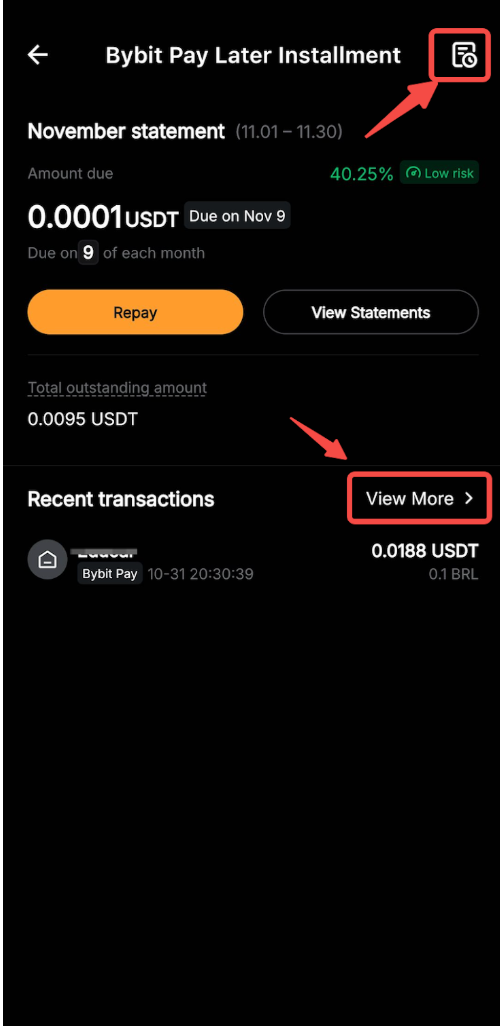
You can also tap the history icon in the top-right corner or select View More next to Recent transactions to access the Pay Later transaction page.
From there, switch between the Transaction, Repayment and Liquidation tabs to view relevant details. Tap any transaction to open its Payment Details page, and tap the right arrow icon in the Bybit Pay Later section for more information.